Showing posts with label retro. Show all posts

Saturday, December 2, 2017

Egg Nog- Cocktail of the Month: December

Egg Nog has a long and storied history.  It can be traced to medieval times, when monks drank a milky ale with eggs. Over time the recipe transitioned to what we would consider a traditional egg nog, and then transitioned again to what you buy in the store - which has no “nog” and minimal egg. After researching (we just can’t help it!) and reassuring ourselves that the salmonella risk was minimal to non-existent, we set out to find a “traditional” egg nog recipe to try.

We discovered an authentic recipe "written by George Washington's own hand” (https://www.almanac.com/content/george-washingtons-christmas-eggnog), and decided out of the plethora of options, this was one we had to try!  We reduced the recipe from the crowd sized portion of Mount Vernon’s heyday, to a manageable family or small get together size, and then got started! Our helpful hints and lessons learned are included in parentheses!

Our Recipe
2 eggs
2/3 cups heavy cream
2/3 cups milk
2Tbs sugar
1/3 cup brandy
1.5 oz bourbon
1.5 oz rum (we used Goslings Black Seal, use any dark Caribbean Rum)
0.5 oz sherry

Mix egg yolks and sugar with a hand mixer until frothy.
Mix in dairy to egg yolk mixture.
Add mixed liquors slowly while beating so that they do not cook eggs (if you add the alcohol too quickly, the eggs will literally cook- this is why the salmonella risk is minimal- a slow, steady pour will work fine).

Over-beaten whites, Oops!
Beat egg whites (after they have sat and reached room temperature) just until stiff peaks form - do not overbeat! (If you put them in a KitchenAid and walk away or work on something else they WILL overbeat.  They will be very stiff, and it will be much harder to fold them in without lumping). 

Fold into yolk mixture.
Refrigerate to set a few min, hours, days (We chilled for about an hour- mixture will start to separate, but you can shake the container to remix it).
It will mellow with time, (our research indicates that people keep egg nog for a year or longer; we kept it for about a month, the flavors did mellow and mix more over time)
This made 3.5 measuring cups full.

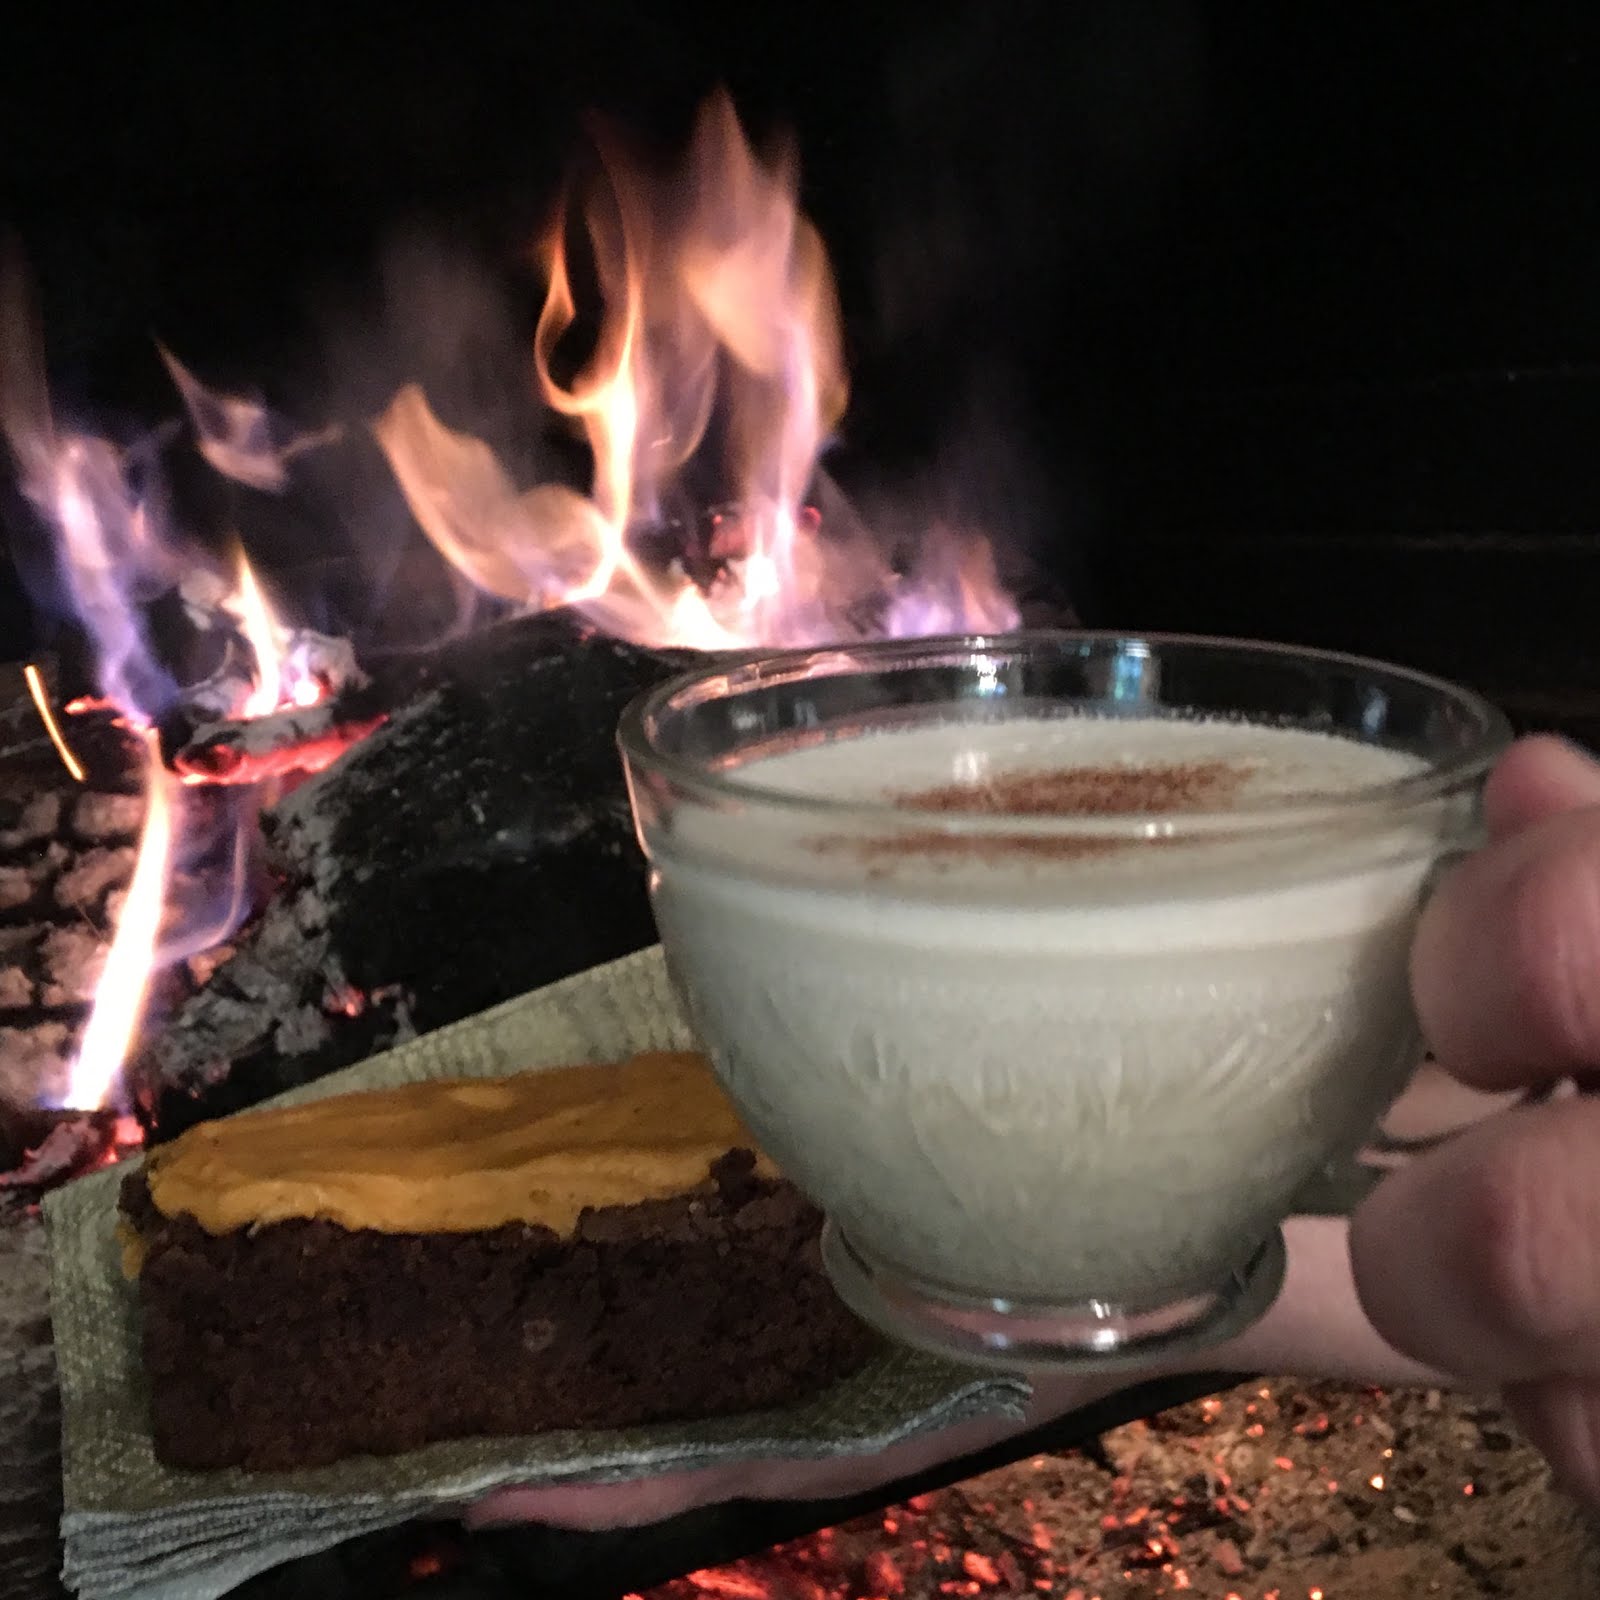
Overall, it was much easier to make egg nog than we anticipated, and it was delicious! The mix of liquors created a blended flavor that did not overfocus on any particular flavor , and the final drink was not nearly as sweet or heavy as the commercially available options. If you love egg nog, definitely give this a try, if you have never really liked it, mix some up and see if it changes your mind!  Note: We found this drink goes quite nicely with a roaring fire in the fireplace!


Merry Christmas and Happy Holidays!
Cheers!

Stacy and Christine

Wednesday, August 2, 2017

Cocktail of the Month- August: Sidecar


The Sidecar, like many vintage cocktails, appears to be of dubious origins. Many tales credit its creation to Harry's Bar in Paris- inspired by an American officer during World War One. Others have a similar story substituting London's Buck's Club. The most reasonable (I think) explanation being both establishments based their drink on an old 19th Century cocktail from - where else- New Orleans. 


If one traces back the recipe, it takes on a distinctly New Orleans flair. The mixture of French Cognac and Curaçao from the Spanish Islands reflects the mix of nationalities  present in the very distinct world of New Orleans.  Curaçao, over time, was replaced by Cointreau - as the drink gained in popularity and needed an orange liquor that was reliably and consistently produced (the early Curaçao was not). When Curaçao production stabilized it included blue food dye- which would totally change the classic look of this drink. 

In the French style, the Sidecar is made with equal parts cognac, Cointreau and lemon juice. In contrast the English sidecar has 2 parts cognac to one part Cointreau and one part lemon juice. Traditionally the glass is rimmed with sugar (orange infused if you are really fancy) and garnished with an orange peel twist. 

We chose to make our sidecar in the English style - as we prefer a lighter citrus note- and eliminated the sugar - rim as we don't like overly sweet flavors.  We used Christian Brothers XO Brandy - if you have a favorite brandy its a great substitution. 

We enjoyed the the flavor of this drink, and it's perfect for a hit August night! 

RECIPE 
2 oz. Cognac 
1 oz. Cointreau
1 oz. Lemon juice (we used fresh squeezed) 

If you choose to rm the glass, rub it with the squeezed lemon and dip into a plate of sugar. 

Measure liquids into a shaker of ice, shake well, strain into your rimmed glass and enjoy! 


Cheers! 

Christine and Stacy 


Tuesday, February 21, 2017

Up-Cycled Fur Seat Tips and Tricks!

What does an old vanity seat + a clearance pillow make? 

A Super Fun Fur Seat!!

I love, love, love the fluffy, fur seats and stools trend I've been seeing everywhere!  But, while they are super-fun, they are also more "accent" pieces, and therefore, not super-high on the budget priority list, (much to my fluffy seat-wanting regret).  So...I had decided a while ago, that I would have to find an in-expensive way to make one.  Covering a stool or chair seat is a very simple process.  I won't go into tons of detail here, as there are many, many chair/stool seat covering tutorials already in existence all over pinterest.  As I was on the lookout for something in-expensive, (key being in-expensive), that probably meant I would not be buying something new; fine by me, as I like to up-cycle and re-create things.  Finding the right piece however, that was a bit more difficult.

One Saturday, for fun, my son and I walked up the street to an estate sale that we happened to see going on.  While poking around, over in a corner, I spotted this cute little seat, in need of love, for $4!  With it's retro looking metal tube frame, I knew - this was my seat!  Fluffy fur, here we come!!  note: If you listen carefully, you can probably still hear my husband's groan as I came walking back up the driveway toting my ragged little seat. lolol

The first steps were easy - take it all apart, unscrew it, remove the old staples, fabric, foam, and seat board.
The whole seat needed sanding to remove the old, chipping paint and to prep for new paint.  I used a metal spray primer, plus two coats of my favorite "old gold" color spray paint to re-do it.  For the seat itself, I decided to get some new foam cut, but use the existing wood seat board.

Then the search was on for fur.  Fur fabric is not cheap!  In between looking at various fabric stores, I happened to run through Target for some house-hold goods.  As I was passing the pillows section, the lovely large fur pillows On Clearance, caught my eye.  I realized I could by a pillow large enough to cover my seat on clearance, for less than buying new fur fabric! 

Home I went with my pillow!

I cut a slit in the back of the pillow (this pillow had fur on both sides), un-stuffed it, then stuffed my foam and seat board in, pulling it tight and stapling the excess fabric to the board underneath.
Voila! Fur Seat!!  Re-assemble the pieces, screwing everything back together and you now have a super-fun, fur seat!


And this just makes me smile every time I look at it!  If this gives you any ideas or bit of up-cycling inspiration, I'd love to hear about them in the comments!

Cheers,
Christine


 More random in process pics: